How Can Whale Watchers Photograph Humpback Whales Without Missing the Moment?
Photographing a humpback whale in the wild is exciting, but it can also be challenging. A whale may surface for only a short time, lift its tail, roll through the water, or disappear before you have a chance to press the shutter. On a whale-watching trip, the boat may be moving, the light can change, and the animal may appear somewhere you were not expecting.
For travelers visiting Samaná Bay in the Dominican Republic, preparing for these moments can make whale photography more rewarding. You do not need the most expensive camera or professional experience to take memorable pictures. A suitable setup, a little patience, and an understanding of basic wildlife photography can make a significant difference.
This guide explains how to prepare your camera, choose useful settings, compose better images, and photograph humpback whales responsibly while enjoying your excursion.
Why Is Humpback Whale Photography So Challenging?
Wildlife photography is different from photographing a person or a stationary landscape. A whale cannot be asked to repeat a movement, remain in the same position, or surface at a convenient moment.
Several factors make whale photography difficult.
Unpredictable behavior: A whale may surface, breathe, dive, or move in another direction without warning. Not every encounter includes a dramatic jump or a visible tail.
Changing distances: A whale may appear close in one photograph and much farther away in the next. Zooming can help, but excessive digital cropping may reduce image quality.
A moving platform: The boat can rise and fall with the waves. This makes it harder to keep the animal framed and maintain a steady composition.
Changing light: Bright sunlight, clouds, reflections, and shadows can affect exposure and contrast.
Brief opportunities: Some interesting behaviors last only a moment. Being ready before the whale appears is often more useful than trying to adjust every camera setting at the last second.
The best approach is to prepare in advance and accept that not every sighting will produce a perfect photograph.
1. Choose the Right Camera for Your Trip
You can photograph humpback whales with a smartphone, a compact camera, a bridge camera, or a camera with interchangeable lenses. The right choice depends on your budget, experience, and how much equipment you want to carry.
Smartphone cameras
A modern smartphone can produce attractive photographs when a whale surfaces relatively close to the boat and lighting conditions are favorable.
Use the main camera when possible, keep the lens clean, and avoid relying too heavily on digital zoom. If your phone offers burst shooting, use it for brief action sequences.
A smartphone is also useful for wide images that show the whale, the ocean, and the surrounding landscape together.
Compact and bridge cameras
These cameras can be convenient for travelers who want more optical zoom without carrying a large collection of equipment. A bridge camera with a long zoom range can help frame whales that appear farther away.
Before your trip, practice using the zoom and focusing controls. Learning the controls in advance means you can spend more time watching the animal instead of navigating menus.
Cameras with interchangeable lenses
A mirrorless or DSLR camera can provide greater control over shutter speed, focus, and image quality. A telephoto zoom lens is often useful for photographing wildlife at a distance.
However, larger equipment can be difficult to handle on a moving boat. Choose a setup that you can hold securely and operate comfortably without obstructing other passengers.
Practical tip: Familiarity with your camera matters more than owning the most expensive equipment. A camera you can use quickly and safely is often the better choice.
2. Prepare Your Camera Before Leaving Shore
A whale can surface before you have finished adjusting your equipment. Prepare your camera before the boat departs so that it is ready for a quick photograph.
Check the battery level and charge spare batteries if you have them. Empty or replace your memory card if space is limited. Clean the lens and confirm that your camera is set to save images at a suitable quality.
If you plan to record video, check the available storage and battery life in advance. Video files can use significantly more space than individual photographs.
Consider these preparation steps:
- Charge batteries fully.
- Bring a spare battery and memory card when available.
- Choose a convenient autofocus mode.
- Learn how to change shutter speed or exposure compensation quickly.
- Turn on image stabilization if your equipment supports it and the setting is appropriate for your shooting method.
- Keep your camera strap secured.
- Use a protective bag or weather protection that allows quick access.
- Check the operator's rules about equipment and safe movement around the boat.
Avoid leaving essential adjustments until a whale appears. A few minutes of preparation can save valuable time during a sighting.
3. Use a Fast Shutter Speed for Moving Whales
Shutter speed determines how long the camera sensor receives light. A faster shutter speed can help freeze movement, while a slower speed may create motion blur.
For photographs of surfacing whales, a starting point around 1/1000 of a second can be useful when the light allows it. Faster speeds may help capture rapid splashes or other quick movements. Slower speeds can sometimes work for calmer scenes, but they require steadier handling and careful attention to movement.
These are starting points, not universal rules. The best setting depends on available light, the whale's movement, the focal length, and the camera's capabilities.
If you use a camera with manual controls, consider shutter-priority mode. You select the shutter speed, while the camera adjusts the aperture as needed. Keep an eye on the resulting exposure, especially in cloudy conditions.
If your images appear too dark, you may need to increase the ISO, open the aperture, or choose a slightly slower shutter speed. Raising ISO can introduce image noise, so balance it against the need to freeze movement.
For automatic-camera users, a sports or action mode may be a practical alternative.
4. Understand Autofocus and Burst Shooting
Autofocus helps the camera maintain focus on a subject. Continuous autofocus, often called AF-C or AI Servo depending on the camera, can be helpful when a whale is moving.
If your camera supports subject tracking, experiment with it before the trip. Tracking performance varies across camera models and may not reliably identify a whale in every situation.
Burst shooting captures several frames in quick succession while you hold the shutter button. This can improve your chance of getting a sharp image during a brief movement.
Burst mode is especially useful when photographing:
- A whale lifting its tail before a dive.
- A sudden splash.
- A brief breach, if one occurs.
- A sequence of surface movements.
- Water droplets falling from the whale's body.
Burst shooting does not guarantee a successful photograph. You still need to keep the subject in the frame, maintain focus, and choose the best image afterward.
To avoid filling your memory card unnecessarily, use bursts selectively rather than holding the shutter continuously throughout the trip.
5. Anticipate the Moment Without Predicting Too Much
You cannot know exactly when or where a humpback whale will surface. However, watching its visible behavior can help you remain prepared for a possible photograph.
For example, if a whale has been surfacing to breathe and then spending time underwater, keep your camera accessible during the next interval. If the animal begins lifting its tail, it may be preparing to dive, offering a brief opportunity for a tail-fluke photograph.
Still, not every dive includes a visible tail lift, and no particular movement guarantees what will happen next.
Listen to your guide's observations, but do not assume that any predicted action will occur. Guides can help passengers follow the encounter; they cannot control a wild whale's behavior.
A useful habit is to watch with your eyes first. When a potentially interesting moment develops, bring the camera up and compose the shot. This can help you avoid spending the entire excursion looking through a viewfinder or screen.
6. Photograph the Whole Scene, Not Only the Whale
A close-up of a humpback whale can be impressive, but wider photographs often tell a more complete story.
Try capturing different types of images throughout the trip:
Wide environmental photographs: Include the sea, coastline, and boat when appropriate. These images can communicate the setting of a Samaná whale-watching excursion.
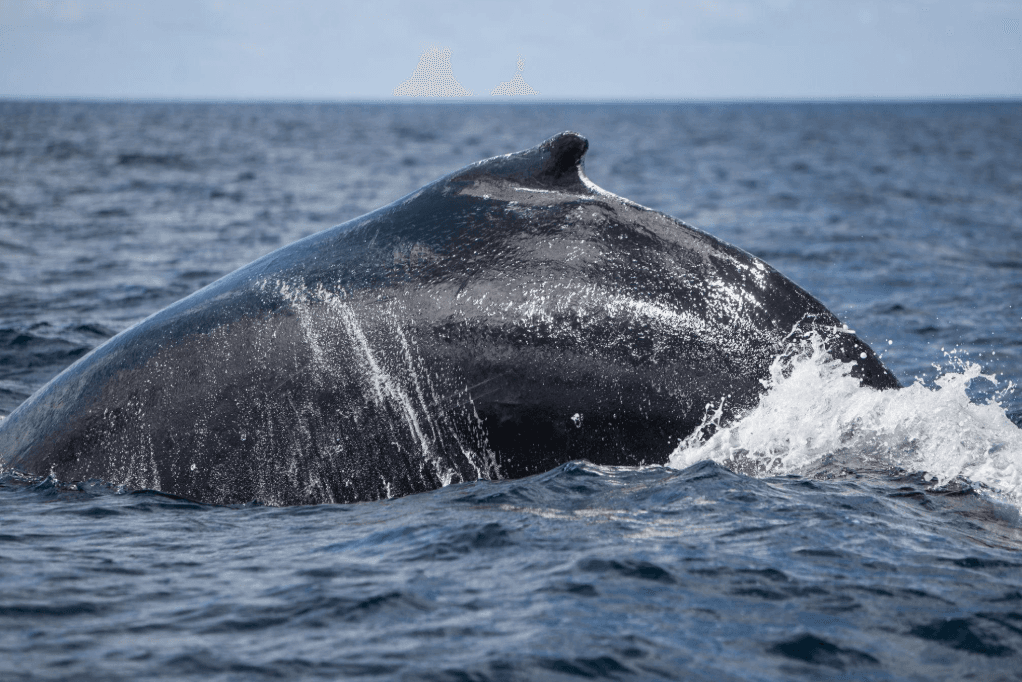
Medium-distance photographs: Show the whale's body as it surfaces, swims, or dives.
Detail photographs: Focus on visible features such as the dorsal fin, tail flukes, or water running off the whale's body.
Contextual photographs: Include the horizon or the surrounding ocean to convey the scale of the encounter.
Change your composition when the situation allows, but do not move to unsafe positions or obstruct other passengers for a better angle.
Leave some space around the whale in the frame when you are unsure which direction it will move. This gives you a little flexibility when cropping the image later.
7. How to Photograph a Humpback Whale's Tail
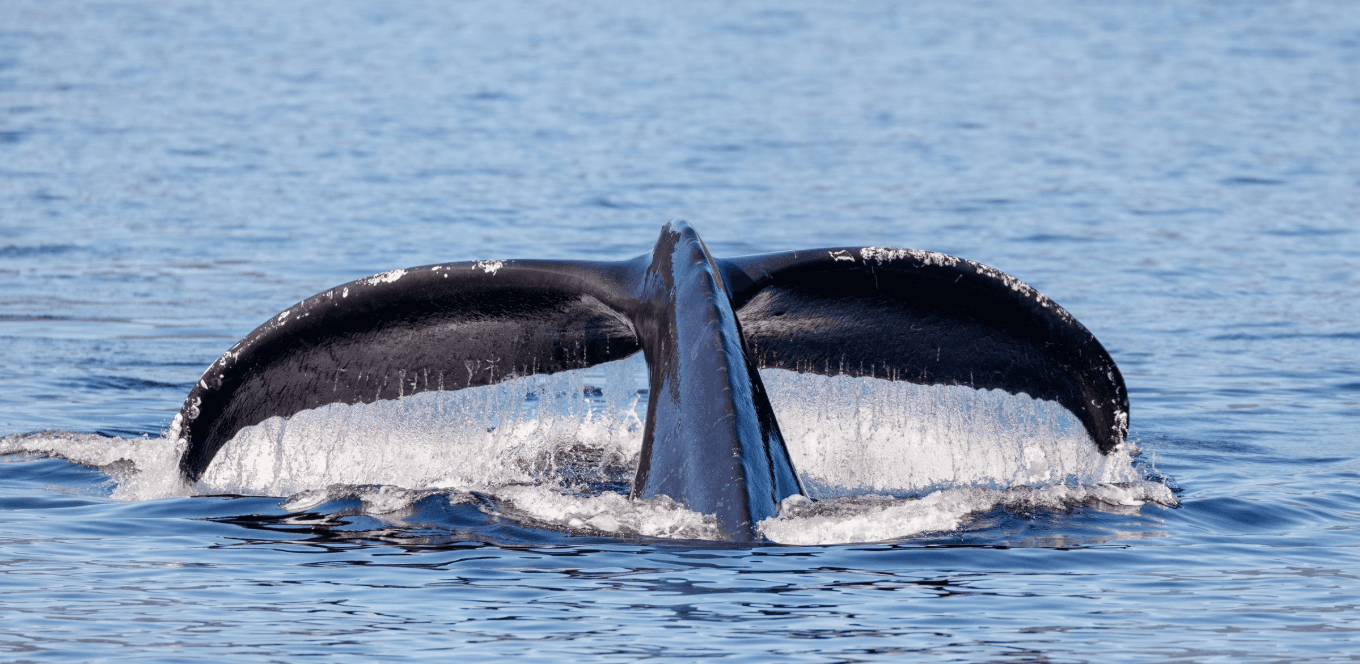
A humpback whale's tail flukes can make a striking subject. The underside of the flukes may show contrasting patterns, scars, or other markings that can help researchers identify individual whales when photographs are suitable for scientific comparison.
For a tail photograph, keep the camera ready when a whale is visible and pay attention to its movements. If the whale raises its tail, use a sufficiently fast shutter speed and try to include the complete shape of the flukes.
Avoid framing so tightly that the tail is cut off. A little extra space around the subject can make the final image more balanced.
Do not assume that a whale will raise its tail before every dive. Some dives occur without a visible fluke display, and waiting for a particular behavior should never distract from safe observation.
If you capture a clear image, keep the original file. Do not heavily alter the markings if you intend to submit the photograph to a whale-identification project. Follow that project's requirements for image quality, date, location, and metadata.
8. Photographing Breaches and Other Fast Movements
A breach occurs when a whale launches much of its body out of the water. It can be one of the most dramatic moments a whale watcher sees, but breaches are not guaranteed on any excursion.
If a whale begins a fast movement, there may be little time to react. A fast shutter speed, continuous autofocus, and burst shooting can improve your chances of capturing a usable image.
Keep a reasonably wide frame until the movement becomes clear. If you zoom in too tightly, it is easy to cut off part of the whale because the animal may rise higher or move sideways.
It is also important to keep expectations realistic. You may return from a wonderful trip without a breach photograph. Images of a calm surfacing, a tail, or the whale's back can be equally meaningful records of the experience.
Never ask a captain or operator to approach a whale aggressively just to improve the chance of photographing a dramatic behavior.
9. Manage Light and Reflections on the Water
The sea can be bright and reflective, especially when sunlight falls directly onto the surface. This can make a whale appear darker than the surrounding water or create bright highlights that lose detail.
Check your images occasionally, but avoid spending so much time reviewing photographs that you miss the next sighting.
If your camera has exposure compensation, a small adjustment may help when the whale appears too dark against a bright sea. Review the result and make changes gradually rather than assuming one setting will work throughout the trip.
Cloudy conditions can produce softer light, while strong midday sunlight can create pronounced reflections. Neither condition automatically prevents good photography; the key is to adapt your settings and composition.
If the sun is creating distracting glare, try changing your shooting angle only when it is safe and permitted. Do not move around the boat without regard for the crew's instructions.
10. Keep Your Camera Steady on a Moving Boat
Even a fast camera shutter cannot solve every problem caused by movement. Holding your camera securely can help reduce blur and make framing easier.
Stand or sit where the crew permits, maintain your balance, and keep both hands available to control the camera when practical. If your camera has a viewfinder, using it may provide an additional point of contact against your face, though this depends on your posture and equipment.
Image stabilization can help with certain types of camera movement, but it does not freeze the whale itself. A moving subject may still require a fast shutter speed.
A monopod or tripod is not always practical on a crowded or moving boat. Check with the operator before bringing support equipment, and never set it up where it could create a trip hazard or obstruct other passengers.
Above all, prioritize your footing and safety. No photograph is worth risking a fall or distracting the crew.
11. Smartphone Tips for First-Time Whale Photographers
You can create memorable whale photographs without a dedicated wildlife camera. If you are using a smartphone, preparation and timing are particularly important.
Clean the lens before the trip, keep the phone securely attached to a wrist strap if suitable, and learn how to activate burst shooting or quick video recording.
Avoid switching between extreme digital zoom levels unnecessarily. If the whale is farther away, a wider image that includes the ocean may look more natural than a heavily enlarged picture with limited detail.
When recording video, hold the phone steadily and keep clips short enough to manage your storage. If the phone offers optical zoom, use it where practical. Digital zoom can reduce detail, especially in difficult lighting.
Consider capturing both photographs and a few short video clips. Photographs preserve individual moments, while video can record movement and the sounds of the surrounding environment.
Remember that water exposure can damage many devices. Use suitable protection and follow the manufacturer's guidance about water resistance.
12. Photograph Whales Responsibly
Responsible wildlife photography means allowing the animal to behave naturally rather than trying to force a better view.
Do not encourage a boat operator to approach too closely, pursue a whale persistently, or change course in ways that could disturb the animal. Follow local regulations, operator guidance, and applicable wildlife-viewing rules.
Keep your equipment secure and avoid leaning over railings or standing in restricted areas. Do not use a drone unless it is explicitly permitted under the applicable rules and operator guidance; drone restrictions can apply around wildlife and protected areas.
Be considerate of other passengers. Everyone has come to observe the whales, and blocking their view or rushing across the boat for a photograph can spoil the experience.
Finally, do not judge the quality of your excursion solely by the number of photographs you take. Watching a humpback whale breathe, swim, or disappear beneath the surface can be rewarding even when you do not capture it perfectly.
13. Organize and Edit Your Whale Photographs After the Trip
After returning to shore, back up your images before deleting anything from your memory card. If possible, keep a second copy of your favorite photographs.
Choose the clearest images, remove accidental duplicates, and crop carefully. Moderate adjustments to exposure, contrast, and color can improve a photograph, but avoid editing that misrepresents the whale or the conditions of the encounter.
Add useful file names and captions if you plan to publish the images. If you know the date and general location, record those details accurately. Do not claim that a photograph was taken in Samaná Bay if its location is uncertain.
If you share photographs online, include descriptive alt text so people using assistive technology can understand the image. For example: “Humpback whale lifting its tail flukes above the water during a whale-watching trip in Samaná Bay.”
Use only images you own or have permission to publish, and check the license conditions for stock or third-party photographs.
What Should You Pack for Whale-Watching Photography?
A simple checklist can help you prepare without carrying unnecessary equipment.
- Camera or smartphone.
- Fully charged batteries.
- Spare memory card if needed.
- Telephoto zoom lens if appropriate for your camera.
- Lens cloth.
- Suitable rain or splash protection.
- Secure camera strap.
- Protective case or dry bag.
- Sun protection and drinking water for the excursion.
- Any additional items required by your tour operator.
The best kit is one you can manage comfortably while following the crew's safety instructions.
Frequently Asked Questions
What is the best camera for photographing humpback whales?
There is no single best camera for everyone. A smartphone can work well in favorable conditions, while a camera with optical zoom and responsive autofocus can help photograph whales at greater distances. Choose equipment you understand and can handle safely.
What shutter speed should I use?
A shutter speed around 1/1000 of a second is a useful starting point for many moving-whale photographs when light allows. Faster settings may help with sudden splashes, while lower speeds may be necessary in dimmer conditions. Adjust according to your camera and the scene.
Do I need a telephoto lens?
A telephoto lens can help fill the frame when whales are far away, but it is not essential. Wide photographs can capture the surrounding ocean and create a strong sense of place.
Should I photograph or record video?
Both have advantages. Photographs capture individual moments, while video records movement over time. Choose whichever suits the experience, and leave time to observe the whale directly.
Can I guarantee a photograph of a whale breaching?
No. Breaching is unpredictable, and whales may not breach during your trip. Preparing your camera improves readiness but cannot guarantee a particular behavior.
Is it safe to use a camera on a whale-watching boat?
It can be, provided you follow the crew's instructions, secure your equipment, maintain your balance, and remain in permitted areas. Avoid actions that distract the crew or put you or other passengers at risk.
Can I use my whale photographs for identification?
Some clear photographs, particularly images of the underside of a whale's tail flukes, may be useful for identification projects. Contact the relevant research or citizen-science program and follow its image-submission guidelines. A photograph alone does not automatically establish an individual's identity.
Where can I photograph humpback whales in the Dominican Republic?
Samaná Bay is a well-known seasonal whale-watching destination. Sightings depend on timing, conditions, and whale activity. Choose a responsible operator and check current trip details before traveling.
Conclusion: Be Ready, but Enjoy the Encounter
Photographing humpback whales in Samaná Bay is a combination of preparation, patience, and flexibility. A familiar camera, an appropriate shutter speed, reliable autofocus, and thoughtful composition can help you capture memorable moments without requiring professional equipment.
Prepare your settings before departure, keep your camera secure, and listen to your guide. Look for opportunities to photograph the whale's full body, tail flukes, or the wider ocean setting, but remember that wild behavior cannot be scheduled.
Most importantly, make room for the experience beyond the camera. A memorable whale-watching trip is about seeing these remarkable animals in their natural environment, not simply returning with a perfect photograph.

Local explorer & expert guide in Samaná Bay Whale Watching.